>

Tuesday, April 23, 2013

Seasoned Seaweed

Seasoned Seaweed
Adapted from www.maangchi.com


I seem to have a lot of favorite Korean side dishes that I love to make repeatedly. This seaweed side dish is another favorite I love to eat with brown rice and kimchi. This recipe makes about a 4-cup quantity and can be stored in the refrigerator for about 1 week. If you like to eat the seaweed wrap of a sushi, you will love this side dish.

3.4 ounces dried seaweed or dolijaban**
3 thick stalks green onions, thinly slice entire stalks (about 1.4 ounces)
3 cloves garlic, finely minced (0.5 ounce)
3 tablespoons Bragg Liquid Aminos or any low-sodium soy sauce (1.2 ounces)
1/2 cup water (4.0 ounces)
2 tablespoons organic brown rice syrup or agave nectar (1.0 ounce)
3 tablespoons sesame oil (0.9 ounce)**
3 tablespoons roasted sesame seeds (0.6 ounce)**

**These items can be purchased at a Korean market or any Asian stores that carries Korean products.

 
Measure out 3.4 ounces of dried seaweed. Set aside.
 

A closer look at the dried seaweed. This seaweed is very different from the flat square nori sheets that are used in rolling up sushi. This dried seaweed or laver looks like strands of seaweed woven together into large thick sheets or rounds. This type of seaweed are used for soups, stews and salads.

 
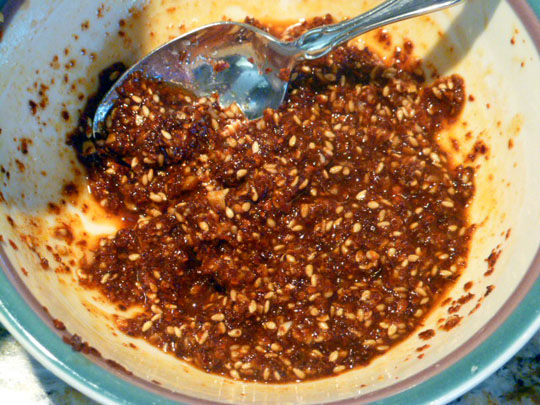
In a very large mixing bowl, combine the green onions, garlic, liquid aminos, water, brown rice syrup, and sesame oil.


 Whisk ingredients until thoroughly blended.
 

Crush, pull and tear the seaweed apart into small pieces over the sauce.


Wearing a disposable vinyl glove, toss the seaweed and the sauce until all the seaweed are saturated with the sauce and thoroughly coated.


Sprinkle in the sesame seeds and toss well until thoroughly combined.


Transfer seasonsed seaweed into an airtight container and store in the refrigerator. Best to allow the seasonsed seaweed to sit in the refrigerator for several hours before consuming as the flavors will deepen with time.
Serve as a side dish alongside with brown rice and other side dishes.

Yield about 4 cups

Thursday, April 18, 2013

Spicy Shredded Cabbage MuChim

Spicy Shredded Cabbage MuChim


Here is another favorite Korean side dish recipe adapted from www.aeriskitchen.com. I am addicted to this cabbage side dish. It has a nice balance of spicy, salty, tangy, and a touch of sweetness all in one. It is delicious eaten as a side dish alongside with rice, meats, seafood, and/or other vegetable side dishes. I'm satisfied just eating this with rice all by itself. It doesn't keep too long in the refrigerator, so you do want to consume it within a few days. I had mine for about three days and it was still delicious on the third day.

Half of a medium-size green cabbage, core removed, thinly sliced to fine shreds (1 pound, 453g)
2 thick stalks green onions, finely chopped (40g)
3 tablespoons Korean coarse red pepper powder (17g)**
2 tablespoons apple cider vinegar (21g)
1-1/2 tablespoons roasted sesame seeds (9g)**
1 tablespoon sesame oil (9g)**
1 tablespoon organic brown rice syrup (14g) or agave nectar
1 large garlic clove, finely minced (6g)
1 teaspoon salt (5g)

**These items can be purchased at a Korean market or any Asian stores that carries Korean products.


In a large mixing bowl, combine the cabbage and green onions. Set aside.


In a separate small bowl, combine the red pepper powder, vinegar, sesame seeds, sesame oil, brown rice syrup, garlic and salt. Stir the sauce with a spoon until thoroughly blended.


Add the red pepper powder sauce to the cabbage. Wearing a disposal vinyl glove, toss the cabbage and sauce until cabbage is thoroughly coated with the sauce.


Salad can be eaten right away or transfer to an airtight container and store in the refrigerator for up to a few days.


To serve, transfer desired amount to serving dish. Sprinkle with roasted black sesame and white sesame seeds for garnish. Eaten as a side dish alongside with any meat or seafood dishes and, of course, BROWN RICE.

Yield about 6 cups

Tuesday, March 5, 2013

Amaranth Porridge

Amaranth Porridge
Adapted from Three Many Cooks


Amaranth is a seed rather than a grain. You can find amaranth at Whole Foods Market or any health food stores. They are sold in packages and in bulk bins. Amaranth is inexpensive so do give it a try because it is very delicious. Amaranth is a nutrient powerhouse. It is gluten-free and contains more protein, calcium, magnesium, iron, and fiber than any other type of gluten-free grain. When cooked as a porridge, amaranth has the appearance of cream of wheat, but tastes very different from cream of wheat. It is thick and somewhat glutinous, a bit earthy and nutty in flavor, creamy with a slight crunchy texture...that is the best I can describe amaranth. It is delicious and I wish I had tried this sooner. It was love at first bite. It takes 25 minutes to cook amaranth porridge. It smelled grassy at first (I wasn't sure if I was going to like it) and almost seem impossible that it will thicken up, but it will. It will require your stirring attention during the last 10 minutes of cooking time because it will thicken up quite fast at the end and may scorch if you leave it unattended. I like my porridge on the thick side since I like to add unsweetened fresh coconut milk to my porridge when I eat it, so cooking with 3 cups of water is a perfect amount to use.
 

1 cup of amaranth (6.5 ounces)
3 cups of cold water (24 ounces)
Pinch of salt
4 teaspoons organic unrefined coconut oil (0.6 ounce)
2 tablespoons evaporated cane sugar or coconut palm sugar (0.6 ounces)
1/2 teaspoon ground cinnamon
1/4 teaspoon ground cardamon

 
In a medium-size pot, bring water, amaranth and salt to a boil over medium-high heat (7.0 on induction cook top) When mixtures comes to a boil, lower heat to medium-low heat (4.0 to 3.0 on induction cook top). Continue to cook for 25 minutes, stirring occasionally. Partially cover pot because mixture will splatter as it becomes thicker. Pay close attention during the last 10 minutes of cooking time because mixture will thicken up quite fast and may scorch if you don't stir it frequently. Consistency will be quite thick and glutinous-like. When done, stir in sugar, coconut oil, cinnamon and cardamon. Remove from heat and ready to serve.

 
Serve with unsweetened fresh coconut milk, soy milk, almond milk or any type of milk of your choice. Top with fresh or dried fruits and toasted nuts, if desired.
 
Can store any remaining porridge in the refrigerator in portions and reheat in the microwave for about 1-1/2 minutes on high power.
 
 
Yield 4 servings
 
Calorie count for each serving (5.8 ounces) of amaranth porridge including 1/2 cup of unsweetened fresh coconut milk is 273 calories.

Monday, February 25, 2013

Cornmeal Waffles

Cornmeal Waffles
Adapted from epicurious.com


My quest for the ultimate cornmeal waffles is over because I have found the most amazing cornmeal waffle recipe. I've been on a waffle craze the last two weekends. Partly because my husband loves waffles and I love the challenge to make healthy waffles he will enjoy. I made an Almond Flour Waffle last weekend which we enjoyed and this weekend, I made a cornbread waffle. While I thought that cornbread waffles turned out good, I still wanted to continue my search for a better one. I came across this recipe which I think is the ULTIMATE cornmeal waffles. After my first bite of these waffles, my search is over. I can't imagine there could be a better cornmeal waffle recipe more superior than this recipe I'm about to post. If you love cornbread, you will love these waffles. And the best part is that it's 100% WHOLE-GRAIN. What I love about these waffles besides tasting like a very delicious cornbread, these waffles are crispy on the exterior and tender and light on the interior. It has a bit of a grainy texture from the cornmeal, but this is the texture of cornbread. This recipe does not contain any type of sweeteners, but you can add some sweetness to this batter if you like. If you are going to eat these waffles with maple syrup (hopefully 100% pure) or any type of syrup of your choice, you don't need to add any sweetener to this batter. I'm thinking these waffles will be perfect along with something savory, like Chicken a la King or even a thick chili or a hearty stew or even fried chicken (chicken and waffles). Waffles are not only served for breakfast. It's becoming a trend on the west coast to serve waffles with something savory.

1 cup WHITE whole wheat flour (4.3 ounces)
1 cup Bob's Red Mill brand FINE grind cornmeal (4.8 ounces)
2 teaspoons aluminum-free baking powder
1 teaspoon baking soda
1/4 teaspoon salt
3 large eggs (5.4 to 5.7 ounces)
2 cups well-shaken cultured low-fat buttermilk (16 ounces)
6 tablespoons organic unrefined coconut oil or butter, melted (3 ounces)


In a medium-size bowl, combine the flour, cornmeal, baking powder, baking soda and salt. Stir well with a whisk to combine all the ingredients together. Set aside.


In a large-size bowl, lightly beat the eggs with a whisk. Add the buttermilk and whisk together until blended. Add the coconut oil and whisk everything together until well blended.


Add the flour mixture all at once to the buttermilk mixture and stir gently with a pastry fork or a whisk just until combined. Set aside to thickened for about 30 minutes.

Preheat a waffle iron for about 15 to 20 minutes. Coat waffle iron with nonstick cooking spray. Spread 3/4 cup of batter for two 4-inch thick waffles onto hot waffle iron, spreading batter to the edges with a spatula. Cook for 4 minutes or until steaming stops. Repeat cooking procedure with remaining batter.


Serve waffles with 100% pure maple syrup over waffles.
 
Keep waffles warm by placing waffles on a baking sheet lined with a wire rack, uncovered, in the center of a preheated oven at 200 degrees.
 
Store any leftover waffles in a plastic bag in the refrigerator. To reheat, place waffles in a toaster.

Yield eleven 4-inch thick waffles

One waffle with 1 tablespoon of pure maple syrup is about 245 calories. Each waffle is about 195 calories and 1 tablespoon of pure maple syrup is about 50 calories.

Sunday, February 17, 2013

Almond Flour Pancakes or Waffles

Almond Flour Pancakes or Waffles
Adapted from The Roasted Root

I love this pancake recipe from The Roasted Root. It's a very simple recipe to put together early in the morning and it's also quite delicious and wholesome. Almond meal flour are finely ground almonds. It's so finely ground that it looks like a powder. Almond meal flour can be purchase at most supermarkets. A popular brand would be Bob's Red Mill. You can also find almond meal flour at Whole Foods Market or other health food stores sold in packages or bulk bins. Most almond meal flour are made from blanched skinless almonds so the flour is a creamy white color. Trader Joe's sells almond meal flour at a very reasonable price. Trader Joe's almond meal flour are ground with their skins so the flour have dark brown specks. You can use either brands. Because almond meal flour is nothing more than finely ground almonds, you will taste the nutty graininess from the ground almonds in your pancake. I don't mind the grainy texture. My husband does not like this texture so he didn't care for the pancake. This morning, I decided to be adventurous to try making waffles with the same pancake batter and it worked. My husband enjoyed the waffle version a lot more than the pancakes. With me, I like them cooked both ways. So it's nice that this batter works well cooked as a pancake or as a waffle.

1-3/4 cups almond meal flour (5.9 ounces)
1 tablespoon organic natural cane sugar (0.3 ounce)
1 teaspoon aluminum-free baking powder
1/4 teaspoon salt
2 large eggs, beaten (3.6 ounces)
3/4 cup UNSWEETENED fresh coconut milk, almond or soy milk (6 ounces)
1 teaspoon vanilla extract

In a small bowl, combine the almond meal flour, sugar, baking powder and salt. Using a small whisk or a fork, stir mixture until thoroughly combined. Set aside.

In a separate large bowl, combine the eggs, coconut milk and vanilla. Whisk until combined. Add the almond meal flour mixture. Using a pastry fork or a whisk, gently stir everything together just until combined. Set aside to allow the batter to sit at room temperature for 30 minutes to thicken.

 
For PANCAKES: Lightly wipe a light coating of oil on the inside of a 12-inch nonstick skillet and heat it over medium-high heat (6.5 on induction cook top) until hot. When pan is hot, add three scant 1/4 cup batter to the pan. You will hear the pancake batter lightly sizzle as you add the batter to the pan.
 
 
Let it cook on the first side for 4 minutes. Flip each pancake over and cook the second side for 2 minutes.
 
 
Serve with 100% pure maple syrup.
 
Yield nine 3-1/2-inch size pancakes.
 
For three pancakes plus 1 tablespoon of pure maple syrup, the calorie count is about 445 calories. Each pancake by itself is about 132 calories. 1 tablespoon of pure maple syrup is about 50 calories.
 
~~~~~~~~~~~~~~~~~~~~~~~~~~~~~~~~~~~~~~~~~~~~~


For WAFFLES: Preheat a waffle iron for about 15 to 20 minutes. Coat waffle iron with nonstick cooking spray. Spread 3/4 cup of batter for two 4-inch thick waffles onto hot waffle iron, spreading batter to the edges with a spatula. Cook for 4 minutes or until steaming stops. Repeat cooking procedure with remaining batter.
 
 
Store any leftover waffles in a plastic bag in the refrigerator. To reheat, place waffles in a toaster.
 
 
Yield five 4-inch waffles

One waffle with 1 tablespoon of pure maple syrup is about 287 calories. Each waffle is about 237 calories and 1 tablespoon of pure maple syrup is about 50 calories.

Monday, February 4, 2013

Pickled Red Onions

Pickled Red Onions
Adapted from Food Network
 
These pickled red onions are great condiments to tacos or any Mexican dishes, sandwiches, bugers, or salads.
 
 
1-1/2 cups white vinegar (12 ounces)
6 tablespoons organic cane sugar (1.8 ounces)
1/2 teaspoon red pepper flakes
1 tablespoon kosher salt
1-1/2 large red onions, thinly sliced (12 ounces)
1 tablespoon dried Mexican oregano, crushed
 
In a small saucepan, combine the vinegar, sugar, red pepper flakes and salt. Cook over medium heat, stirring frequently, until sugar dissolves. Mixture does not need to come to a boil. Remove from heat and add the onions and oregano. Let the mixture cool before transferring to a 24-ounce jar (photo above is an old 24-ounce Safeway Select salsa jar). Keep at room temperature for about 6 hours; then place in the refrigerator for several weeks.
 
Yield 24 ounces

Slow Cooker Mexican Pulled Pork

Slow Cooker Mexican Pulled Pork
Adapted from Simply Recipes
 
When Elise Bauer from Simply Recipes first tweeted about her new recipe post, I knew that her Slow Cooker Mexican Pulled Pork was what I wanted to cook on Super Bowl Sunday. I didn't realize that finding a boneless pork shoulder roast on the day before Super Bowl would be so difficult. It did not occur to me that pork shoulder (boston butt) is a popular meat on Super Bowl. My first stop was at Whole Foods Market at $4.99 per pound. The pork shoulder roast was nicely trimmed, tied and roast-ready, but the price was not appealing to me. My second stop was at Sprouts Farmers Market which the pork shoulder roast was completely sold out at $1.99 per pound. I was staring at the empty display thinking that I could of spend half the price, but came too late. My third stop was at Safeway. Also at $1.99 per pound, there were only two packages of boneless pork shoulder remaining. All I can see is 1 inch of fat on both packages. I could feel my arteries clogging just looking at the thick layer of fat going through the meat. It wasn't hard for me to make a decision to return to Whole Foods Market and spend the money for quality meat. That is what I did and ask the butcher for the leanest cut he can find and I was done. That evening, I untie the pork roast as instructed in Elise's recipe. I'm thinking I'm going to find a huge chunk of fat hidden in the center of the meat, but it was pretty lean. Whole Foods Market did great! I did remove a little bit of fat from the roast (after all, it is a pork shoulder), but there were no regrets paying extra for quality meat at Whole Foods Market. And the Mexican Pulled Pork, it turned out delicious! It was tender and full of flavor.
 
 
4 tablespoons chili powder (0.5 ounce)
1 tablespoon brown sugar (0.3 ounce)
4 teaspoons kosher salt (0.5 ounce)
2 teaspoons smoked paprika
2 teaspoons ground cumin
1 teaspoon cayenne pepper
1 teaspoon ground oregano
1 teaspoon onion powder
1 teaspoon garlic powder
1 teaspoon ground black pepper
1/4 teaspoon ground cinnamon
1/16 teaspoon of ground cloves
4 to 4.25 pounds boneless pork shoulder roast (leanest as possible)
 
Whisk together the first 12 ingredients in a small bowl. Set aside.

If the roast is tied up with butcher string, untie it. Remove as much visible fat as possible. Pat the roast dry with paper towels. Generously rub the spice mix into the roast all over, reserving any leftover spice mix for later. Place roast in a large plastic bag and refrigerate to marinate in the rub overnight.
 
The next day, heat a frying pan on medium high heat until hot. Add 2 tablespoons olive oil. (If you are using a slow cooker with a removable insert that can be used on the stove top, use that, otherwise use a separate pan.) Place the roast in the pan and brown on all sides. Transfer roast to the slow cooker and add any reserved spice rub. Cook on the low setting for 7 to 8 hours, until the pork is fall apart tender.
 
Remove the roast from the slow cooker and place on a cutting board. Cut into large chunks. Then use two forks to pull the meat apart into bite-size shreds. Degrease the juice in the slow cooker. Return the shredded meat to the slow cooker and toss to coat with the juice from the roast.
 
Serve with corn tortillas, pickled red onions, sliced avocados, salsa, Mexican Cabbage Slaw and cilantro.

 
Time to eat!
Yield 8 servings